6 easy ways to organize your math centers
Make your math centers accessible for students with disabilities.
Math centers are powerful tools to differentiate learning but they can get real messy real fast! It can be hard to keep your math centers organized and running smoothly.
And what happens when you have students with disabilities who might be more impulsive, have difficulty reading labels, and need refocusing during independent work?
In this blog post, I share 6 steps to help you set up your math centers and keep them organized all year round so your students with disabilities can work independently and successfully.
Let’s close our eyes and imagine for a moment: We enter your classroom and see students sitting in small groups, working on math tasks.
There’s a gentle murmur of math chatter among students: Let’s try putting the 5-stack and the 3-stack together. What number do you think we’ll make? Cuisenaire rods are shared each table as students work together to solve problems and discuss their solutions.
Students know exactly what to do and where to find the math materials they need. They’re working independently, so you pull aside a small group of 5 students to work with individually.
At the end of center time, students quietly put the math materials back in the bins. Papers get stacked neatly, pencils put away in desks.
If this doesn’t sound like your classroom, it can be! Taking the time to organize your math centers and build routines now will pay dividends later on.
But how do you organize math centers in the special ed classroom, when you have students who might be easily distractible and struggle to work independently?
Step one: Label + picture = success
As a teacher, you’re already a pro at keeping everything in your classroom labeled. Math centers are no exception! If everything has the right label, students will know where to find math materials and where to put them away.
But some of your students will struggle to read what’s on the label. The manipulatives you have in your math centers are probably really tricky to read - dominoes, pattern blocks, unifix cubes, foam counters, base 10 blocks...the list goes on!
To help kids keep math materials organized, I recommend two things:
[Disclaimer: The links below are affiliate links, which means I may get paid a commission if you purchase through those links.]
-
Use clear bins with lids so that students see what’s inside them. I used these larger ones and these smaller bins in my classroom. I prefer bins with lids because your bins will inevitably get knocked over and lids keep everything in place. I love these colorful baskets and used them for other things, but to avoid finding unit cubes under the rug months later, use lids for your math manipulatives!
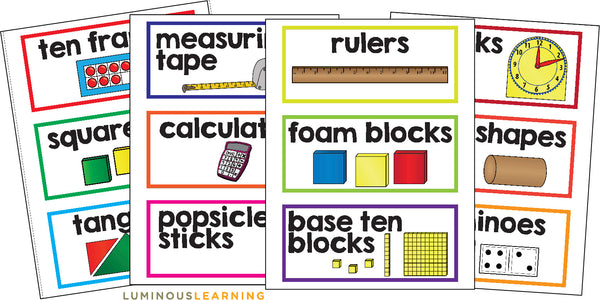
- Use labels with pictures so struggling readers immediately know what belongs in that bin.
Get these FREE math center labels with pictures in my math center bundle!
Step two: Organize your games and activities in separate baskets or binders
Ok, you put all your manipulatives in clear bins and taped on labels with images. Time to start thinking about your math center activities. Here are some ways to organize all the materials you need:
[Disclaimer: The links below are affiliate links, which means I may get paid a commission if you purchase through those links.]
- Print your activity materials on heavy-duty card stock, like this one.
- Laminate everything that students will use. That’s right, everything. Every printed direction, task card, or handout that students fill in. I didn’t always have access to a laminating machine, so sometimes I used these heavy duty sheet protectors, instead. If you laminate or use a sheet protector now, your activities will last longer and you won’t have to reprint and remake them later.
- A corollary to the point above: laminate almost everything. Depending on the activity, sometimes I wanted students to fill out the recording sheet with dry erase marker and sometimes I wanted them to write their answers in pencil. Don’t laminate recording sheets that students should fill out with pencil :)
- Keep all your math center activities organized in color-coded binders or baskets. For example, print the activity directions, game board, recording sheet, etc. on green heavy-duty cardstock, then keep it in a green binder or green basket. This will help your students with disabilities keep everything organized- green game, green recording sheet, green basket. I used these classroom baskets to organize my games and activities.
- I went Ziploc bag crazy in my classroom and used baggies to organize any small pieces. Do you have game pieces? Ziploc baggie. Do students need to use dice and dry erase markers? Ziploc baggie.
- Schedule prep time to review your math centers. I usually did this about once a month, as I was wrapping up one math unit and beginning another. I went through my bins of math manipulatives and my math center games and activities. I made sure the right pieces were in the right place and nothing was missing. It usually took about 2 hours.
- Go ahead, open your planner or Google calendar now. Schedule a time about once a month when you can reorganize and reassess your math centers. Trust me, if you don’t schedule it now, it’s not going to happen!
Step three: Make your math center activities accessible for students with disabilities.
Do your centers involve games, worksheets, or task cards? Do students need to follow directions to be able to work independently?
This can be challenging for students with disabilities, but we can make it less challenging in a couple of ways:
- Use pictures. We already saw the virtue of using pictures when labeling your math manipulatives. Same goes for math activities! Do you have a list of directions? Try simplifying them and adding pictures. Use as few words as you can. This can be challenging- trust me, I’ve always been better at using more words, not less! But the more you try cutting words, the more you realize how you can simplify directions for students with disabilities.
- Challenge of the day: Try writing directions to a math game or activity with using only pictures (if you do this, email me a picture at hello@luminouslearning.com!)
- As you’re organizing your manipulatives, think about whether they’re accessible for students with disabilities. Do your students struggle with fine motor skills? Some math manipulatives may be tricky for them to grasp and manipulate, so try using virtual manipulatives instead. Virtual manipulatives are also great for students with behavior management problems who might not use physical manipulatives appropriately.
- Consider how you’re grouping students. If the activity has more steps and involves reading complex directions, you might want to pair your students heterogeneously- pair a stronger reader with a weaker reader, for example.
Step four: Build routines and be consistent
Students with disabilities thrive on routines. If you haven’t started using math centers, it’s not too late to build those routines now! (It’s never too late to start good math practices :) Some routines you can develop include:
- Knowing what center they’re doing. I posted my math centers and who was in each center on the smartboard, but you can also post them on a pocket chart.
- One student at each table is responsible for getting the math activity and any necessary materials and bringing them back to the table (I assigned classroom jobs at the beginning of each month).
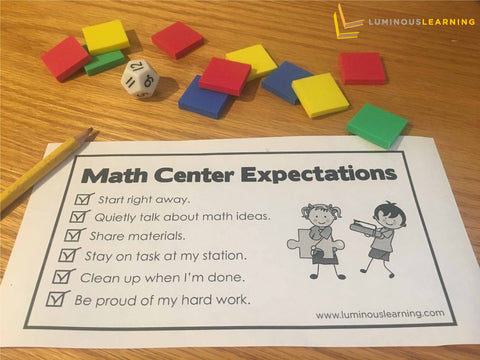
- Remind students of the math center expectations.
Download my expectations chart as part of the math center bundle.

The trick is doing math centers on a regular basis to reinforce these routines. If you only do them a few times a month, it’ll be difficult for students to remember and follow your center routines.
I also don’t change my activities often so students weren’t constantly learning new directions and routines. At first, I worried that students would get bored with the same center activities over and over again, but I didn’t find that to be true. I only introduced 1 - 4 new center activities in each unit, which was enough to keep students engaged.
Step five: Model and reflect
Don’t expect students to work independently without first seeing the activity in action.
Anytime I introduced a new activity, I modeled how to do the activity. And then modeled it the next day. And sometimes the next...well, you get the idea.
There was a lot of modeling in the beginning, but if I put in the time to make sure that students knew how to do the math center activity early on, it set a strong foundation for them to work independently for weeks afterward.
But I wasn’t the only one who modeled math centers in my classroom. I kept an eye out for pairs or groups of students who were doing a great job collaborating, staying on task, having engaging math discussions, and completing the activity correctly.
At the end of the math lesson, we did a “fishbowl” and those students modeled the activity for the whole class. Then we reflected on what the students did well.
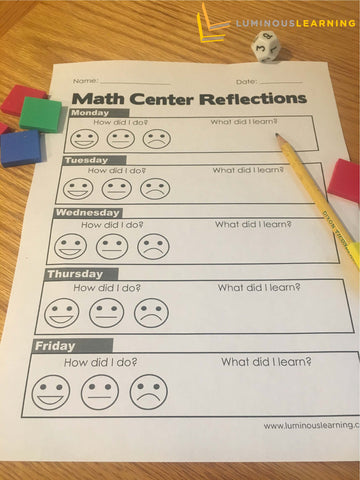
I’m also a big believer in self-reflection, so I had my students fill out a reflection sheet at the end of the lesson.
Get this FREE reflection sheet below as part of the math center bundle.

Step six: Clean up, clean up, everybody clean up!
It’s all hands on deck when math centers are over.
The secret?
Don’t end math centers with only 2 minutes to clean everything up before you have to start your reading lesson. Your students are going to need more time to put everything away correctly, which is especially true in the special ed classroom.
The first few weeks (maybe even months?) of the school year, I actively gave my students feedback on how they were organizing the math materials at the end of the lesson.
If I found things put back in the wrong bin, I showed students where the materials belonged.
If I saw missing materials, I had all students pitch in to look for and put back the missing materials.
In my FREE math centers resource bundle, you’ll get:
- math center labels with images for your bins
- math center reflection sheets
- math center expectations chart
Ok, we covered a lot of ground! To sum it up, here’s a rundown of what materials you’ll need to organize your math centers:
- Large clear bins with lids
- Small clear bins with lids
- Colorful baskets
- Labels with pictures (get them for free with my ultimate bundle above)
- Ziploc bags
- Heavy-duty sheet protectors
- Thick card stock
Math centers can be a powerful addition to your math teaching, but they can be difficult to organize and maintain in the special education classroom.
As you saw above, making math centers successful involves a lot of upfront planning on your part and considering whether your activities, routines, and math materials are accessible for all learners in your classroom.
But now the good news- if you put in the time now, even your most struggling learners can actively and successfully participate in math centers!
How do you organize your math centers so that they’re accessible for your special education students?


